I want to write some articles about using Aws serverless services. Part of that is trying them out and deploying changes from a local machine. There are a number of ways to do that, but the one I want to focus on is using the Serverless Application Model CLI with secure credentials. This article will show you how to follow along with this setup.
Create an Aws account
The first thing you’ll need is an Aws account. You can create one for free, but you will have to provide a credit card. For more information, see the official documentation.
Install the toolchain
Aws Application Composer uses the Serverless Transform, which is part of the Aws Serverless Application Model. While you can submit your template using Aws Cloudformation, we will be using the SAM CLI which is a CLI you install locally on your machine that provides a number of useful tools for working with serverless projects in Aws.
To install, see the official documentation for your platform.
Setting up account
In order to use the SAM CLI from your machine, you’ll need to federate with your Aws account. This can be done in a number of ways, the most traditional being using IAM access keys. In this post, I’ll be walking you through how to assume access using the Aws CLI, which was installed as part of the SAM CLI. What we’ll be doing is the following,
- Create a user and access keys that has no permissions
- Create a role that allows our user to assume admin permissions
- Use the Aws CLI to assume that role on the console
Create a user
We will first create a user in the IAM console. This user will be used to perform all the actions we’ll do on the
command line. To create the user, find the IAM console, click Users and click Add users. You can name the user whatever
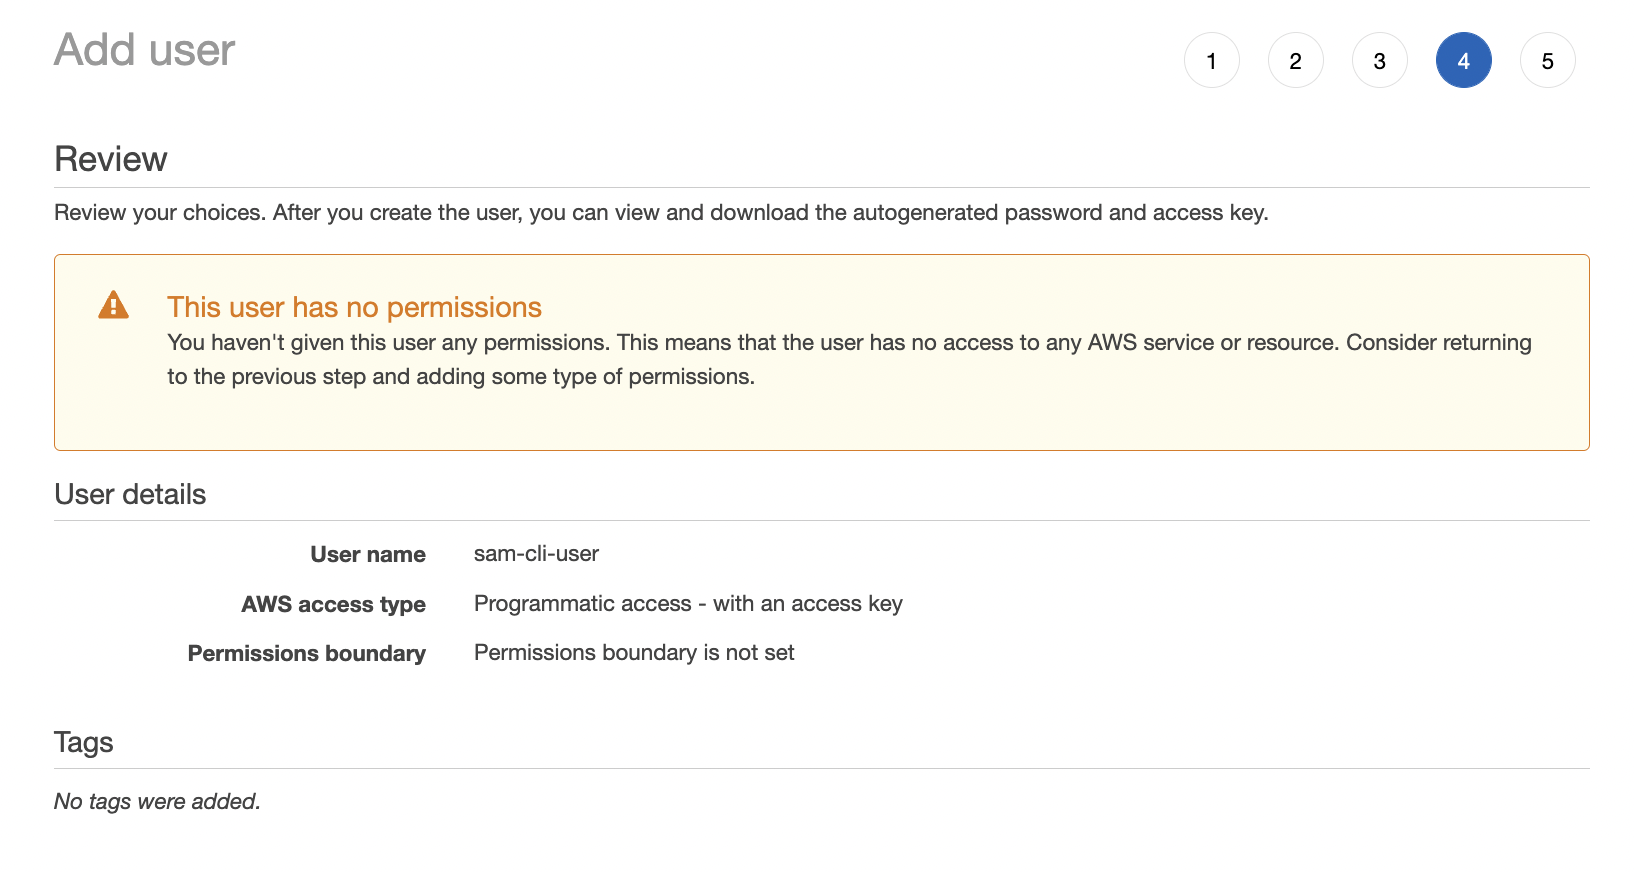
you want, I would suggest sam-cli-user. Check the box for Access key - Programmatic access. Click next.

We don’t need any permissions for this user. This may seem counterintuitive now, but we’ll see why as we progress. Click next.

Tags are Aws’s mechanism to assign information to your resources. You don’t have to use tags, it’s completely up to you. Click next when done.
You can now review the user before you create it. You should see a warning that the user has no permissions. That’s okay. Click create.
Important - The next page is important. This is where we can retrieve the two access keys that we will need to authenticate. The two keys are,
Access key ID- Consider this the user nameSecret access key- More like a password
The reason this page is important is that once you leave it you cannot retrieve your secret access key again. If you lose them, you will have to create a new key pair. Don’t worry if this happen, that’s not hard to do. One more note - these keys are very sensitive. Never share your keys with anyone and never ever publish them anywhere. Doing so can quickly lead to a compromised account.

Once you’ve saved these keys to someplace secure, we’re ready for the next step.
Create a role
Our next step is to create an IAM role. This role will link the user we just created to the permissions that we’ll need in Aws. To create a role, click on Roles in the IAM console and click Create role.
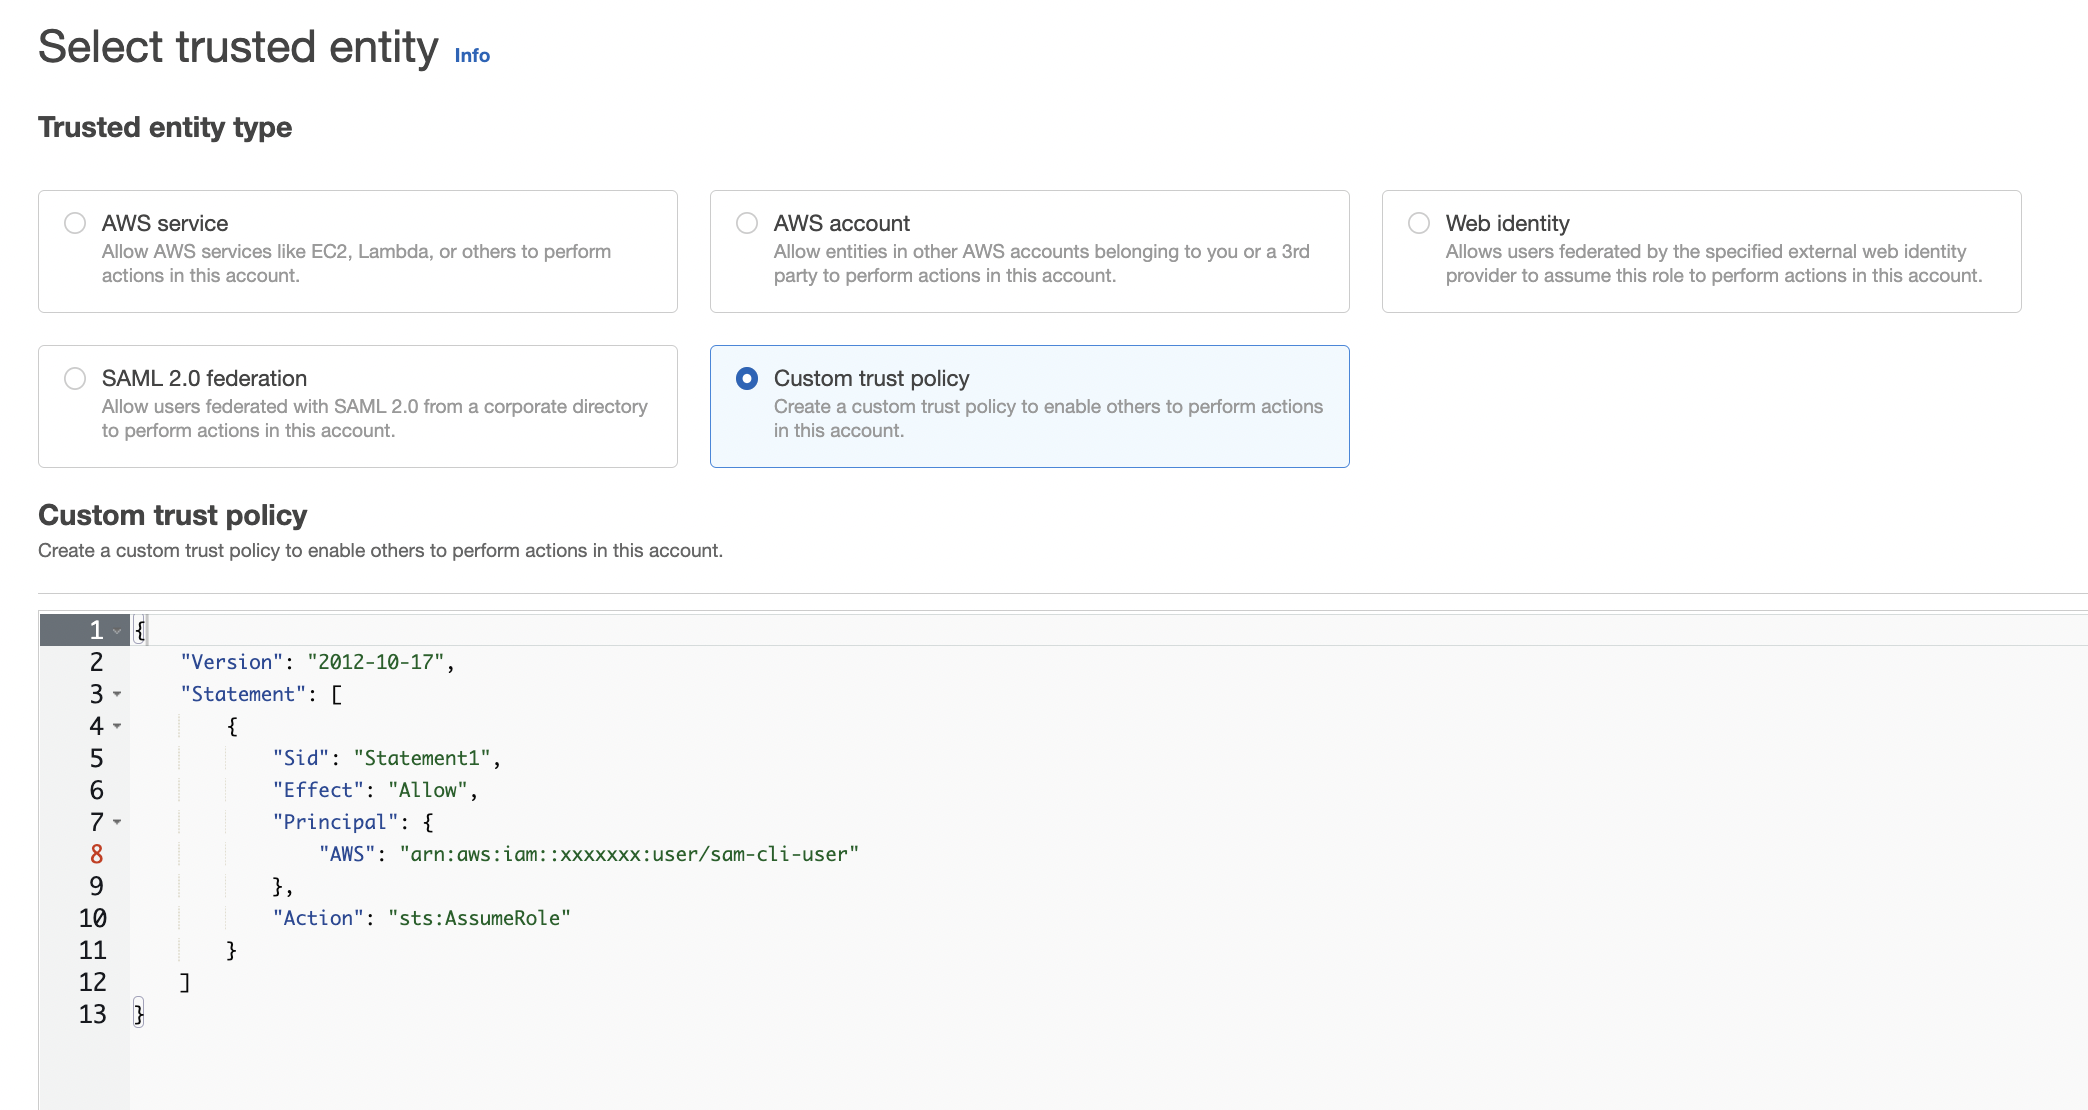
One the Select trusted entity page, click the option for Custom trust policy, and enter the following into the Custom trust policy,
{
	"Version": "2012-10-17",
	"Statement": [
		{
			"Sid": "assumeRole",
			"Effect": "Allow",
			"Principal": {
        "AWS": "arn:aws:iam::<your-account-id>:user/<your-user-name>"
      },
			"Action": "sts:AssumeRole"
		}
	]
}

Let’s break down what we’re doing here. We’re creating a role that says we are allowing the user we just created the action of assuming a role. This seems like a lot of indirection, and you’re right, it is. We’re creating a mechanism to get temporary security credentials since these credentials will have a large amount of responsibility. We will be using this to create resources in your Aws account, so it’s important that we keep it pretty locked down.
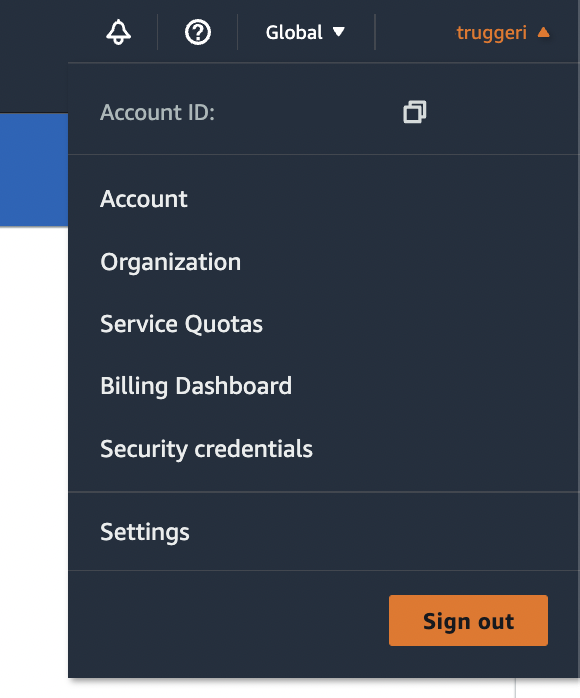
Note that in the above policy you’ll need to replace two fields with the real data from your Aws account. The first is the account ID. If you don’t know this number, click on the dropdown in the upper right corner of the page. The second field is the name of the user we created from the previous step.

Once you’ve configured the trust policy, click Next to continue.
We now need to grant this role a permission. This will be the permissions that our CLI has within our account. Because we will be using the CLI to create resources, we need to grant a pretty broad permission set to our role, but this will depend on your use case. I encourage you to search through the available permissions and set the minimum that you’ll need.
Authorizing
Now that we have a user with access keys, we can use them to assume our broader role and start using the SAM CLI. First, we need to configure the AWS CLI with the keys we created earlier.
aws configure
This command will help you configure a profile to use the AWS CLI with the help of those access keys we created earlier.
Now we’ll run a small script which will get us access keys with our assumed role using the Aws Security Token Service.
unset AWS_SESSION_TOKEN
export $(printf "AWS_ACCESS_KEY_ID=%s AWS_SECRET_ACCESS_KEY=%s AWS_SESSION_TOKEN=%s" \
$(aws sts assume-role \
--role-arn arn:aws:iam::<your-account-id>:role/<your-role-name> \
--role-session-name SAMCLISession \
--query "Credentials.[AccessKeyId,SecretAccessKey,SessionToken]" \
--output text))
I did not come up with this script from scratch - a big thanks to learnaws.org for providing this script.
If everything goes correctly, you’ve just used the Aws CLI to assume the role we’ve created using the user we’ve created. Your terminal now has the three credentials you need to use the SAM CLI. These credentials only last for an hour, so you’ll need to periodically refresh them.
Note on this approach
You may be wondering why we needed to use sts to assume a role rather than simply giving our user admin access from the start. The reason I’ve taken this approach is to limit the blast radius of a potential key exposure. Imagine the scenario where someone accidentally publishes the users keys to Github. In this case, anyone that finds them, and a bot will find them, can act as that user.
While not bullet proof, they will not be able to simply act as an admin with this approach. If they knew the account id and the secret role name, they would be able to assume our permissions, but that’s at least one more set of hoops they would have to jump through to cause havoc in our account.
Wrapping up
What did we do in this article? We learned how to create a user with access keys and a policy that allows that user to assume more permissions. We then used the aws sts cli to assume that role from our terminal for a limited time.